How to Export Audio Files from Logic Pro to Another DAW
With new DAWs (digital audio workstations) continuing to increase, the demand for transferring projects from one DAW to another has also increased. In this article, we will guide you on successfully exporting your session from Logic Pro.
Step 1: Preparing Your Tracks for Export

Image by: Freepik.com
- CREATE A COPY of the session project for exporting. This will ensure that any changes made will not impact the original session such as removing, deleting unused tracks or regions.
- Removing any unused tracks will help streamline the export process.
- Arrange your tracks and consolidate regions to ensure all necessary audio is included for the final production.
- Remove any unnecessary effects or automation that are specific to Logic Pro or not needed in the export. Ultimately, you can export 2 versions of a file that has the effects and the other without to give more options.
Duplicate the Logic Pro Project for Exporting
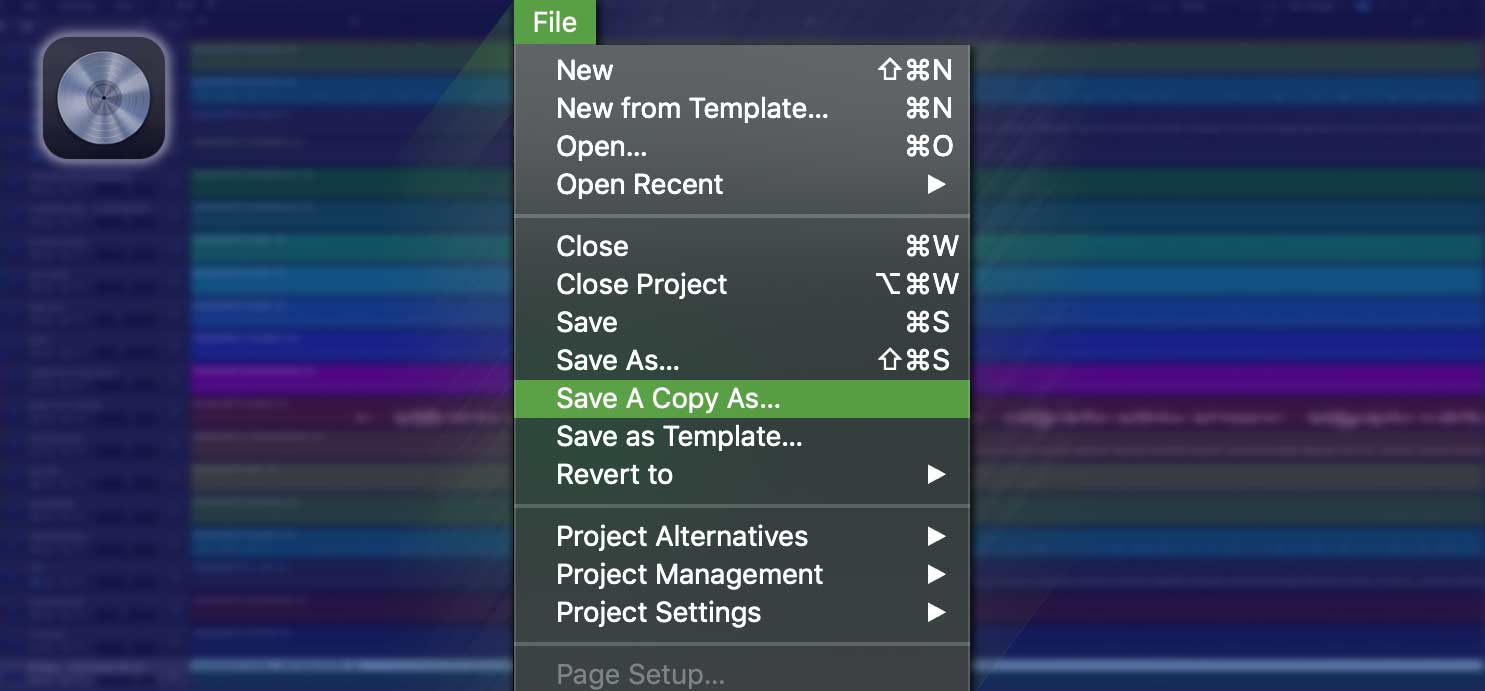
- Choose File > Save a Copy As.
- In the “Save As” dialog, please enter a new name for the project. Title it “Export” for example.
- Select the type of assets you would like to copy to the project, and then click “Save“.
It’s important to do a “Save a Copy As” rather than “Save As” because this will copy all the files to a new project not modifying the original project. You want to do this as some files and elements in the project session might be deleted.
Remove Unnecessary Tracks
It should be known that muted tracks will still be exported. Therefore, if you have any tracks that are not part of the project, it is best to remove them.
By removing any unused tracks, you can significantly reduce the overall file size, making it easier and faster to export your project. This not only saves valuable time but also ensures a smoother workflow for both you and your team.
In Logic Pro, you can delete a track by Control-clicking the track header and selecting “Delete Track” from the shortcut menu.
Consolidate and Organize
By consolidating, you merge multiple regions into one file, eliminating potential gaps or missing audio parts. This guarantees that every element of your composition is accounted for and nothing gets overlooked during the mixing or editing process.
Not only does consolidating and organizing save you time by preventing tedious searches for missing files, but it also reduces the risk of errors, syncing issues, or oversights in your final product.
When consolidating the tracks, it is important to ensure that all regions within the tracks have the same start time in the session. This ensures that all tracks will be properly synced when imported into another DAW.
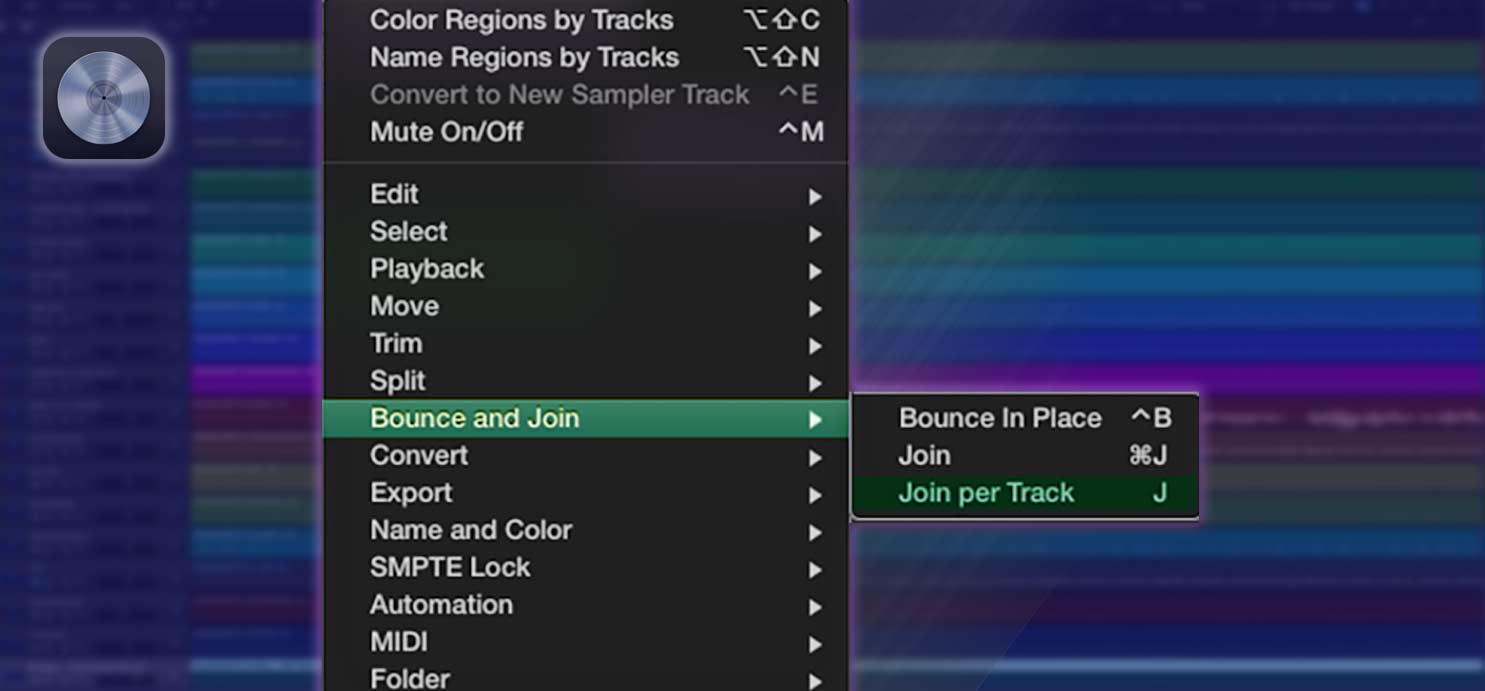 To join the selected regions on each track into a single region on that track, follow these steps:
- Go to the Edit menu.
- Select “Bounce and Join“.
- Choose Join per Tracks or shortcut (J). By doing this, the selected regions on each track will be merged into a single region on that track.
Please note that you have to enable the Advanced Tools in the preferences to enable:
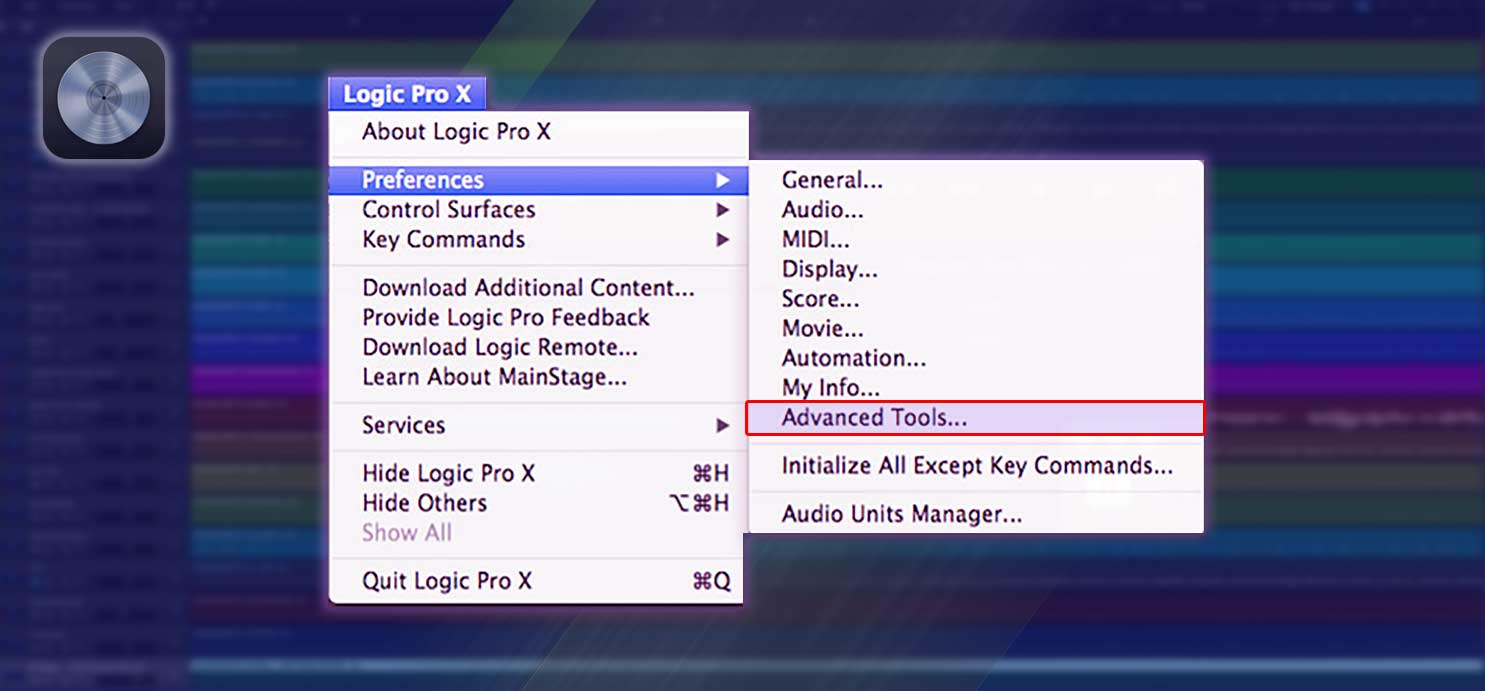 Logic Pro X > Preferences > Advanced Tools
Cleanup Effects and Automation
To clean up your project in Logic Pro, follow these steps:
- Click on “File” in the top menu.
- Select “Project Management” from the dropdown.
- Choose “Clean Up” from the options provided.
- A dialog box will appear.
- In the dialog box, select the checkboxes for the cleanup options that you want to apply to the current project. This is why you created a copy of the session in the first step as some files might be removed and deleted.
Step 2: Setting Up Your Export Parameters in Logic Pro
- Select the desired range: Choose whether you want to export the entire project or a specific section. To select the region or regions in the Tracks area, open Logic Pro and navigate to the Tracks area. From there, choose the desired region(s) by clicking on them.
- Select file format and resolution: Decide on the file format (e.g., WAV, AIFF) and resolution (e.g., 16-bit or 24-bit).
- Select sample rate: Set the appropriate sample rate based on your project requirements.
- Select file destination: Choose where you want your exported audio files to be saved.
Step 3: Exporting the Audio Files
To export your Logic session, follow these steps:
- Navigate to the File menu.
- Select Export from the menu options.
- In the sub-menu, choose “All Tracks as Audio Files.”
- In the Export dialog box, select the WAVE format.
- Finally, choose the desired bit depth for your Logic session.
- Choose whether to enable or Bypass Plug-in Effects.
Step 4: Importing the Exported Audio Files into Another DAW
- Create a new project: Open your desired DAW and create a new project or session.
- Import audio files: Locate the exported audio files from Logic Pro and import them into your new project.
- Align tracks: Adjust start times and ensure all tracks are properly aligned within your new DAW.
Conclusion
In conclusion, exporting audio files from Logic Pro to another DAW is a straightforward process that allows for seamless collaboration with other musicians and producers. By following these steps, you can share your projects across different platforms while maintaining the highest quality of your music production. Start exploring the possibilities today!

