
Getting your session ready and organized for audio mixing is the most important part of making sure your project goes smoothly and stays on track. Listed are helpful tips to get your sessions ready for the mixing engineer.
⚠ Low-quality compressed file formats such as MP3, AAC, and other lossy formats are not accepted.
➊ Reference Mixes
- Provide a rough reference mix. This will be the blueprint of what your vision of the mix is for us to build on.
- Feel free to send a link to an example of a major released song or music that you would like to match up sonically to in terms of sound, energy, effects, and direction.
➋ Editing and Finalization
It is important to make sure your session is properly prepared for mixing. This includes making sure all tracks are properly tracked, organized, and edited.
- Unwanted sounds and noise should be removed: This includes making sure any background sounds are not in the session such as outtakes, major headphone bleed, thuds or thumps, ‘P’ pops, and other unwanted elements that should not be in the final mix.
- Vocals and instruments should be finalized: All tracks delivered should be considered final takes and prepared as intended for mixing. No demo tracks, placeholders, or dubs.
Our basic mixing package does not include extensive editing. If we do find some issues in a mix that requires light editing, we will fix the issue.
For situations that require major editing, it is advised you make the needed edits or an extra charge will be required for the time involved out of the scope of mixing.
Please reference the mixing packages for what services are included before purchasing.
➌ Effects
It is always a good idea to record your effects on separate stereo track(s). This will help the mixing engineer recreate the effects or use the existing processed recorded effects. Be sure not to process the effects on the tracks directly.
Tracks should be dry as possible without reverb, delay and other effects printing directly. Always have effects processed to a separate track. This will give the mixing engineer more control during the mixing process.
An exception would be if you are using outboard effects for instruments such as guitars and other instruments with built-in effects that are part of the desired sound.
➍ Audio Compression
Recording tracks with heavy compression is not advised as removing compression from processed tracks is not always possible. A good rule is to use a “small” amount of audio compression during recording and then process the track with plug-ins to the signal flow in the session. This will not affect the original recording and allows the mixing engineer to process each track accordingly.
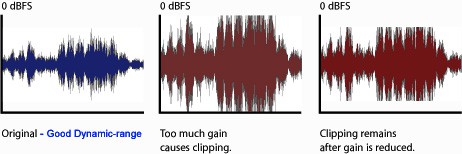
GOOD: The blue waveform above has a good dynamic range and is not over-compressed.
BAD: The red waveform above has had compression and brick-wall limiting applied during the recording process. In this example, the track would not be ideal for mixing.
Don’t over-compress the original recorded signal. Leave final overall limiting and compression to the mixing engineer.
➎ Labeling Tracks
Label your tracks with the correct name and notes. This will help the mixing engineer navigate the session faster and be more organized. There is a small setup fee for sessions that are not labeled or organized as the engineer has to take time to set up the session. Labeling and organizing will waive the setup fee.
➏ Exporting Tracks
If you recorded on another audio program other than Pro Tools, you will need to
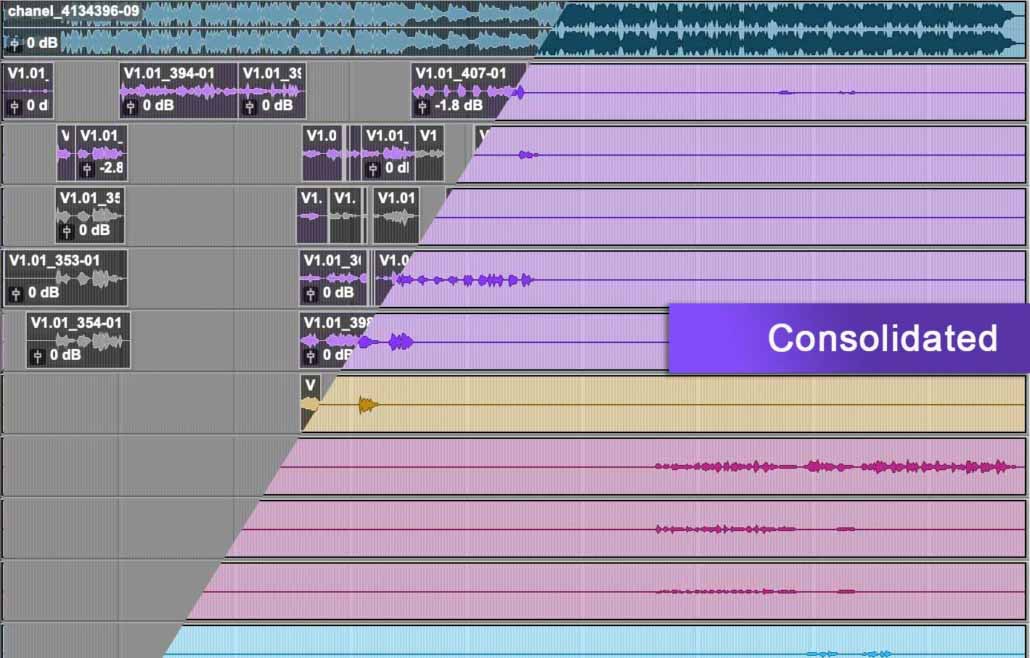
export your tracks as consolidated Wav files.
First, consolidate all the tracks so the start and endpoints are the same. This will ensure that all tracks are in sync and are in the proper location when imported into Pro Tools.

Lastly, export all the audio tracks as Wav files and save them in a folder. This will be the folder you should give for mixing. We recommend that the lowest settings for the Wav files should be 16bit/44.1K for a music release.
Master Peak Level
It is recommended to set the loudest peaks of the tracks at –5 to -3 dB from absolute ‘0’ dBFS. This means you should have the loudest section of the mix 5 dB lower before the peak level of ‘0’.
As a rule, do not go over ‘0’ dBFS on the master fader or individual
tracks during the recording process. This will clip the audio signal and create clicks, pops, and distortion. In most cases, this is not reversible once the audio signal is clipped.
Sending Sessions Online
Now that you have prepared your session(s), it is time to send it to us. You can ZIP your session folder and upload it to our site server. Note: Our server is limited to 1GB per upload. If your sessions are larger, you can send them to us via www.wetransfer.com.


